Scratch-building for beginners - page 6
So far we have cut out the wall sections, cut out the door and window openings, assembled the shell of the house, applied shingles to the walls, put glazing in the windows and doors and glued
the windows and doors in place. What are we missing?
Oh, yeah - the roof!
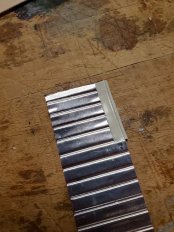
We will be using standing seam roofing a real metal product from Builders In Scale. A note on using this material: it doesn't crush easily and it can be cut with a SHARP hobby knife.
There are three roof panels - panels A and C for the front section of the house (subassembly created by walls 1, 3, 4, and 5), and panel D for the back secton of the house (subassembly created by walls 6, 7, and 8). Glue short sections of corner bracing material inside the tops of walls 3, 5, 6, and 8, locating them 5/64" from the top of the walls to allow the roof panels to nest into the subassemlies. Cut the roof panels to snugly fit inside the wall sections, resting on the bracing.
Note that roof panels A and C are marked for chimney locations. The plans from Scale Model Plans provide a template for the chimneys, but I opted to use Tichy chimney #8123. To do this you must cut out the chimney locations before applying the roofing material. Use the actual chimney as a marking aid to get the size of the opening right.
Once the chimney locations have been cut out it's time to apply the standing seam roofing material to the roof panels. Be sure to paint the roofing material before applying it to the roof panels. I used red auto primer, to represent the red lead paint that Aunt Estelle's roof was painted with.
To prepare for applying the roofing material to the roof panels, paint seven (7) strips of roofing material with red auto primer; six are for the roof proper and one is to make ridge caps.
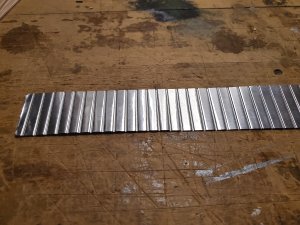
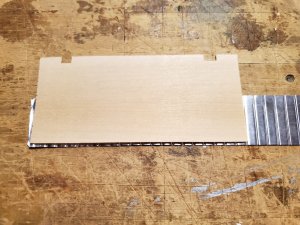
When the paint is dry, lay a strip of roofing material ribs up and set a roof panel on top of it; arrange the roof panel on the roofing material so that there is a 5/64" overhang of roofing material on the sides and the bottom to cover the tops of the walls when the roof panels are put into place. Once you have the roofing material and roof panel aligned, cut the roofing material to size. Cut a second piece of roofing material, only on this piece you will only have the sides overhanging by 5/64".
 |
 |
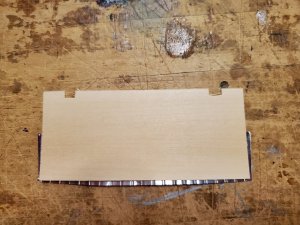 |
leaving a 5/64" overhang |
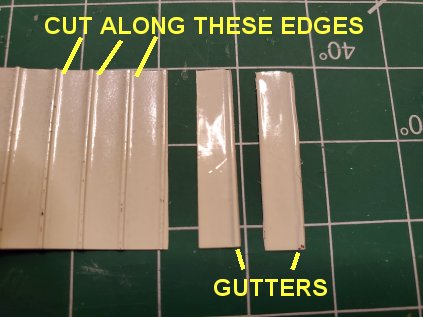
If you want to get fancy-schmancy, you can also make rain gutters out of the ribbed rofing material. DO THIS STEP BEFORE ATTACHING THE ROOF PANELS TO THE ROOFING MATERIAL! The process is similar to making the ridge caps, except that you trim closely along only one side of every rib, which results in a piece of material with one rib and a piece of flat metal to one side of the rib; when these pieces are turned upside down the rib becomes a gutter and the flat metal piece is a tab for attaching the piece to the underside of the roof. Paint both sides of the roofing material you are going to use for gutters; paint it the same color you painted the windows.
With the roofing material face down, apply super glue to the bottom edge, then lay a piece of gutter upside down on the glue. The gutter should just protrude past the bottom of the roofing material.
|
|
To apply the roofing material, take a roof panel and the piece of roofing material to which rain gutters have been applied. Place the roofing material rib side down. lApply super glue in an oval in the center of the roof panel and spread it to the edges with a toothpick. CAREFULLY lay the roof panel on the roofing material so that the roofing material is overhanging the roof panel by 5/64" on the sides and bottom (use a scrap of the 5/64" shell material as a guide). Press down firmly to get a good seal, then weight the roof panel/roofing material sandwich so the roof panel doesn't curl up at the edges. When aligning the bottom, be sure to lay the roof panel in 5/64" from the edge of the roofing material, not from the gutter.
When the glue sets (approximately 1 minute), spread glue on the remaining area of the roof panel and apply a second row of roofing material. Align the ribs on the second section of roofing material with those on the first. Again, weight down the sandwich leavinhg the bottom edge exposed so as not to crush the gutters. Repeat this process for the remaining roof panels.
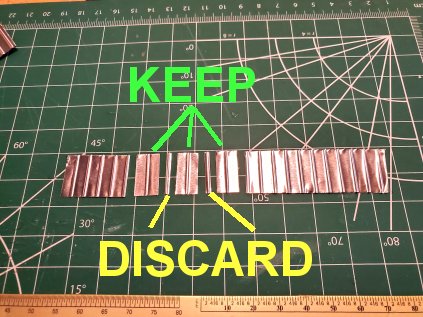
The next step is hard to put into words (but I'm going to try anyway), so please see the picture captioned "Making ridge caps", below. To create the ridge cap segments you will trim a piece of roofing material flush with one standing rib then skip a rib, then trim flush with the third rib; this will result in a single rib with a section of flat metal on either side. As you repeat this process you will end up with single ribs with no metal to either side; these can be thrown away.
|
|
|||
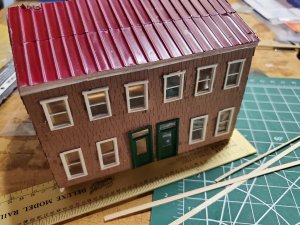
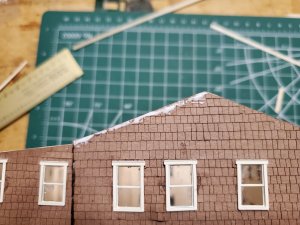
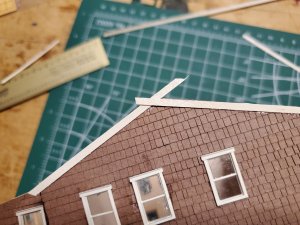
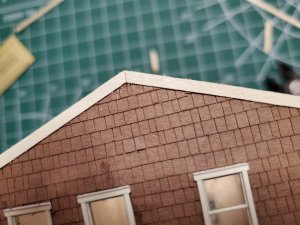
Now we get into asthetics: we're going to apply trim to the house before we attach the roof. The trim is scale 1"x8", painted the same color as the windows before it is applied to the house. Apply the trim around the house at the roofline; on the ends of the house, overlap the ends of two pieces of trim at the peak and cut through both pieces to get a mitered joint.
|
|
|
To attach the roof, apply glue to the gluing blocks and lay the roof panels in their respective recesses, being sure to seat the roof panels snugly on the gluing blocks. Apply ight pressure to ensure a good seal. When all three roof panels have been set in place, install the ridge cap pieces, overlapping each successive piece. Trim the ridge caps at the chimney openings and at the ends using a sharp pair of scissors to avoid dislodging the ridge caps.
| Previous | Next |
